
I love crayons! I typically have a large collection of them on hand, but I hate to break up a set, so I decided to replace my okay box of crayons with an EVEN MORE COMPLETE SET just so I could play around with the current hot DIY project. My old box of crayons is now up for experimentation, and I must say I’m excited.
I looked around for some different recipes and tutorials, and nobody seems to agree on the exact amount of ingredients or which ingredients. I’ve seen people use a combination of coconut oil and olive oil (which I tried the first time and it came out very sheer, but feels amazing), just olive oil (I haven’t tried this but it seems to be the way to go for achieving the best pigment from your strange color choices), or just coconut oil which is what I did for this demonstration. I think the benefit to using olive oil over coconut oil is that it is easier to apply with a brush. Coconut oil melts with your body temperature, but solidifies around room temperature, so in order to enjoy the coconut oil option, you have to warm it up on your finger to apply it smoothly.


Okay, for this project, you will need:
- A crayon (Crayola is a trusted brand, non-toxic and safe for putting on your mouth)
- Coconut oil and a measuring spoon (1 teaspoon)
- a butter knife
- a stick to stir the wax (I used a bamboo skewer because they are cheap and come in bulk packages)
- a container for your finished product (I used a travel jar, these are 2 for $0.97 at Walmart, but you can also use the packaging from scented wax tarts if you want to store a variety of colors and save money)
- A small glass bowl (I used a dessert dish because it had nice little corners for easy pouring)
- A cutting board covered either with wax paper or paper towels
- A pot or pan deep enough to hold water about a half inch below the lip of your glass bowl
- some tongs for retrieving your hot bowl
- an oven mitt for pouring
Prepare your pan of water. You can set the glass bowl in the pan while you pour the water to be sure the water is high enough to warm the bowl but not spill into it when it boils. Set the pan on the stove and wait until your ingredients are ready.

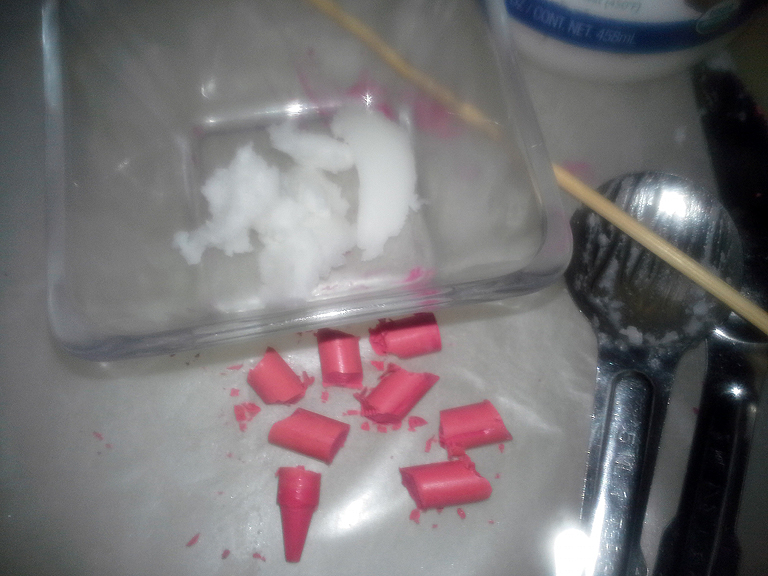
Next, break up your crayon on the covered cutting board with your butter knife. Small pieces will melt faster. Scoop 1 teaspoon of coconut oil into the glass bowl. It will start to liquefy at around 76 degrees, so you will see it soften up in the bowl. You can now heat your water. Bring the water to a boil, then turn the burner down to “warm” or “low” so it maintains the temperature for melting your wax.

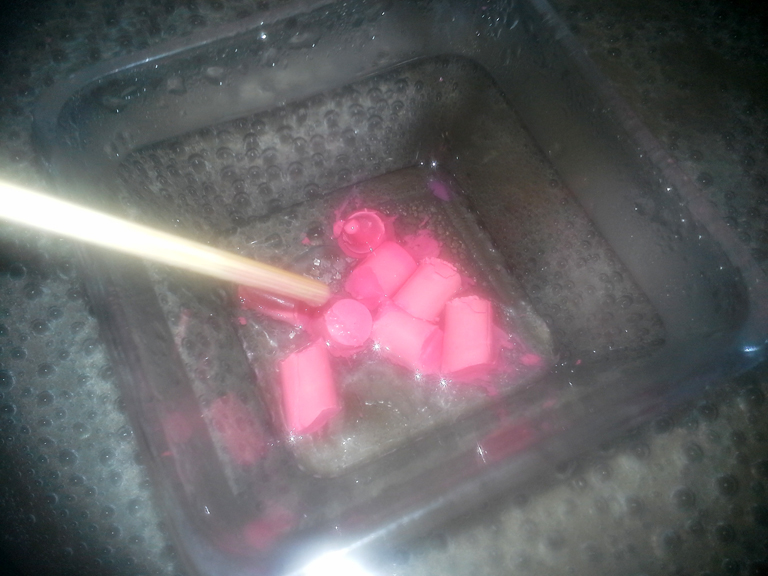
Place the glass bowl into the pan and let the coconut oil become a clear liquid, then add your crayon chunks. The glass should be hot enough that the wax starts to run immediately. Keep stirring it around with your stick to fully blend the ingredients.

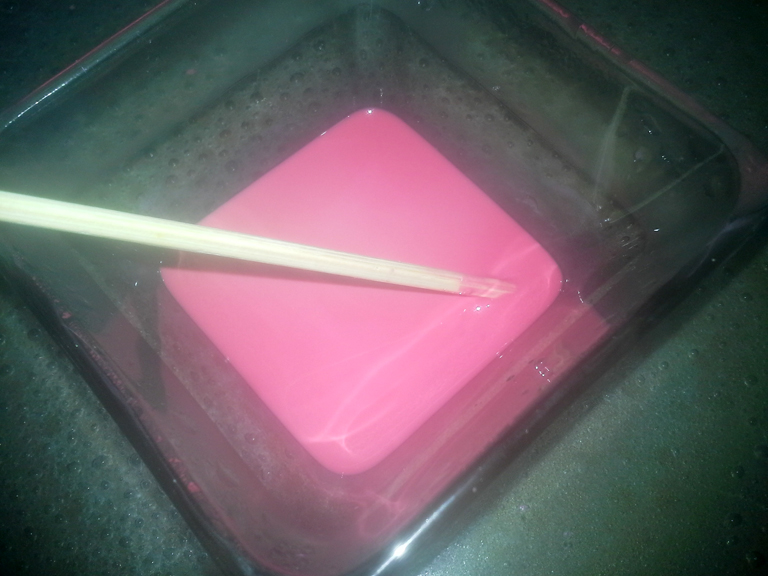
The melting goes pretty quickly from there, so keep stirring until you get a uniform liquid. Retrieve the bowl from the hot water and turn off the burner. I used tongs and my knife to remove the bowl from the water, but it took both hands, so I don’t have a picture. Whatever method you can use without spilling your wax or burning your hands is fine. The wax will stay warm and safe in the pan until you are able to retrieve it, so take your time planning your attack.

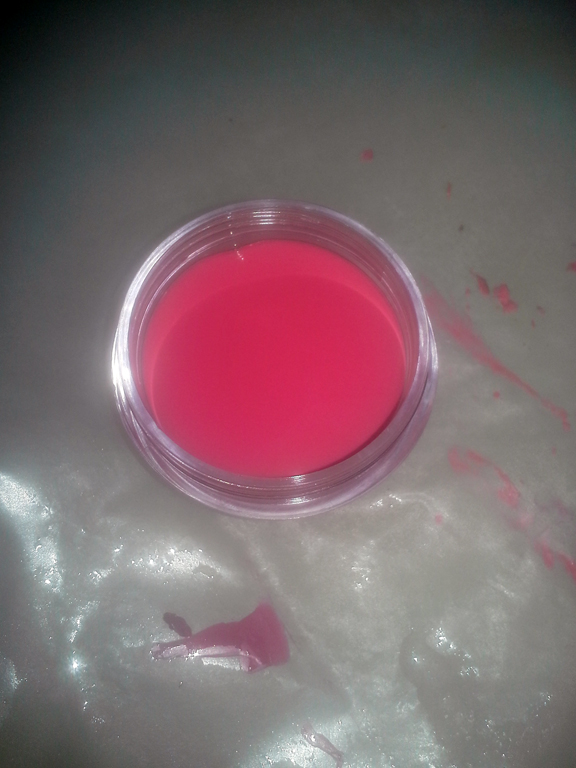
Slap on your oven mitt and pour the hot wax into your container. Set the bowl aside to cool. DO NOT pour the hot wax down your sink drain. It will harden and clog the drain. You don’t want that kind of trouble and your plumber will not be thrilled at your shenanigans. Place your container in the refrigerator for about 10 minutes to cool and solidify. Voila! You have a handy little jar of custom lipstick.
Cleanup is easy. Your pan shouldn’t have anything but water in it, you can wipe the wax off your knife, dispose of your stick, throw out the cover from the cutting board and wipe out your bowl with a paper towel when it’s cool enough to hold.
I had a lot of fun with this. My color choice was tame, but I’m feeling adventurous now. Every time I get a color that I think is “not for me” it ends up being my new favorite thing, so I’m ready to make full use of my box of crayons!
Here are some videos of other folks testing out this project:
